For years, users have been asking Google for a native tool to record the screen on Chromebook. There are a handful of Chrome extensions that do the job pretty well, but they ask for top dollars to dole out access for even basic features. So it was heartening to see Google finally add a native screen recorder in ChromeOS back in 2020. Google has since also released a new Screencast app on ChromeOS, which brings advanced screen recording with support for annotation, webcam view, transcription, and more. So if you want to record the screen on your Chromebook, follow our comprehensive guide. Recording your device’s screen can be useful, but sometimes you have to download third-party apps to do it. Just like on Android phones, Chrome OS has a built-in tool that makes it easy to create screen recordings on Chromebooks.
Using ChromeOS Native Screen Capture
- Open the Quick Settings menu from the bottom-right corner and click on the “Screen capture” tile.
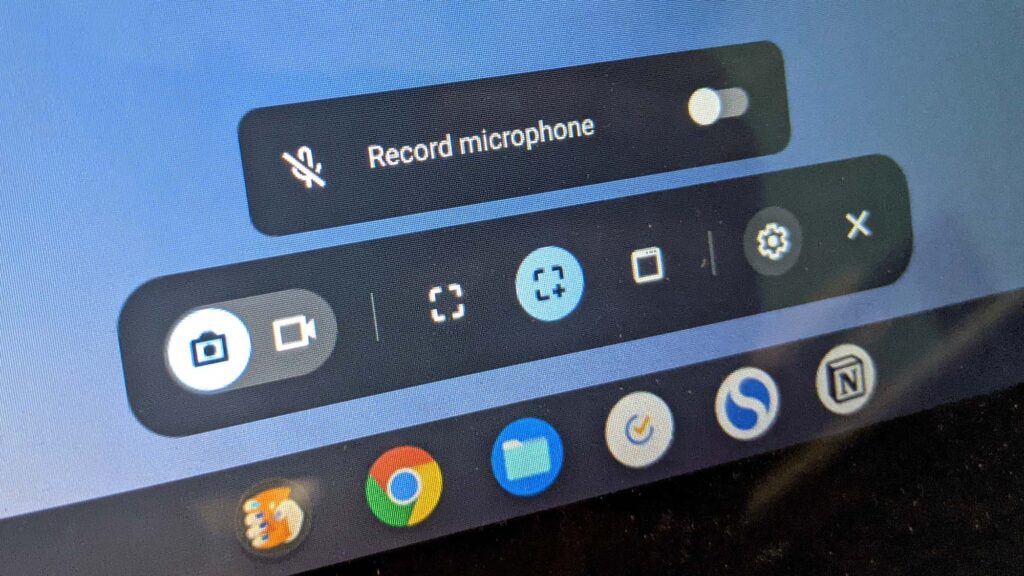
- A bottom bar menu will appear. Click the video icon to switch to the screen recording feature. On the right side, choose how you want to record — full-screen, partial, or active window.
- Hit the “Record” button, and your Chromebook will start recording the screen.
- You can also click the “Settings” icon and turn on “Microphone” under “Audio input” to record your audio. The latest update allows you to add your webcam view, show clicks, and key strokes.
- To stop the screen recording, click the stop icon in the taskbar. The screen recording will then be stored in WEBM format inside the “Downloads” folder in the Files app.
Enhanced Recording with Screencast App
Google has launched a new screen recording app on Chromebook called Screencast. If you have updated your device to Chrome OS 103 or later, you will find this app in the app drawer. Screencast is an advanced screen recording tool, which is targeted at students and teachers, but anyone can take advantage of this awesome new tool. You can make engaging lessons and demos by recording your screen with Screencast on your Chromebook.
- Make sure you have updated your Chromebook to Chrome OS 103 or later. After that, open the App Drawer and click on the Screencast app.
- Click on “New Screencast” at the top-left corner to start screen recording on your Chromebook.
- Choose the full-screen area, window, or partial area to record the screen. The microphone and webcam are enabled by default, which can be disabled from the “settings” icon at the bottom.
- Click the red icon on the shelf to start the recording. You can click the “pen” icon for annotations and drag the webcam view to whichever corner you want. Once done, click on the red “stop” button on the Chrome OS Shelf.
- You will find the recording in the Screencast app. Here, you can review the transcript and edit it.
- Finally, click on “Share” to share the screen recording with a shareable link. Note that Screencast doesn’t save the video locally, which is a bummer.
Recording Device Audio with Nimbus Screenshot & Screen Video Recorder
If you wish to record the device audio on your Chromebook while recording the screen, I highly recommend the Nimbus Screenshot & Screen Video Recorder extension. It’s one of the best Chrome extensions that lets you record the internal audio on Chromebooks. You also get advanced features like webcam view, audio recording from the mic, and more. Here’s how it works:
- Go ahead and install the Nimbus Screen Recorder tool from the link here.
- Open the extension from the extension toolbar and click on “Record Video“.
- Choose “Tab” at the bottom and enable “Record Tab Sound“. You can disable the mic sound toggle if you wish. Note that the internal audio recording option is only available in Chrome tabs and not in other apps.
- After that, click on “Start Record“, and that’s it. You will now be able to record the screen on your Chromebook with device audio using this Chrome extension.
Comparing Screen Recording Options
| Feature | Screen Capture | Screencast | Nimbus Extension |
|---|---|---|---|
| Full-Screen Recording | Yes | Yes | Yes |
| Partial Screen Recording | Yes | Yes | Yes |
| Webcam View | Yes | Yes | Yes |
| Annotation | No | Yes | No |
| Internal Audio Recording | No | Yes | Yes |
| Local Save | Yes | No | Yes |
Final Thoughts on Screen Recording
So these are the three easiest ways to record the screen on your Chromebook. While the basic Screen Capture feature is great, I would have loved it if the tool allowed me to choose the file format, as WEBM is not a friendly video format. And while the Screencast app is fantastic, a local download option would make it even better. Anyway, that is all from us. If you are looking for third-party apps to record the screen on a Chromebook then go through our list. If you are facing any issues, comment down below and let us know how to screen record on Chromebook. Whether you’re on Windows 11, Windows 10, an iPhone, iPad, or Mac computer, you have ways to record the screen.